![]() Download and install
CNebulaX
in your PC
Download and install
CNebulaX
in your PC
How
to download and setup CNebulaX in your hard drive
![]() Instructions and links for installing CNEBULAX in your hard drive
Instructions and links for installing CNEBULAX in your hard drive
 1. Download the new installation ZIP file. It is around 30 Mb, so
be patient if your internet connection is slow.
1. Download the new installation ZIP file. It is around 30 Mb, so
be patient if your internet connection is slow.
2. Create a
temporary folder (whatever you want, for instance
c:\temp) and uncompress the ZIP file there
to have access to the setup files. The setup is now in English and compiled
with MS Visual Studio Windows Installer in MSI format. It is a completely new
setup system. There is no need of external files anymore.
3. Run the SETUP.EXE file and install
the program following the instructions. Select as a folder for installing the
program a short name, for instance C:\INDEX or D:\INDEX. The folder you decided
as program root folder will be referred further as the
[RootCNebulaXfolder] (complements webpage)
4. a) Go to the folder you
have selected for installing the program with the windows explorer.
b) Create a shortcut there to launch CNebulaX
c) Move it to the place you want in your startup menu, or desktop.
Be sure that that the shortcut includes in the
"start in" entry (shortcut properties), the folder that you have
previously chosen for installing the program (C:\INDEX, D:\INDEX, or whatever).
5. VERY IMPORTANT:
6.1. Update the EXE file with the latest
compiled EXE file, which fixes bugs, expand the features, and make use
of new databases (in the case there is a new one). Just overwrite the old EXE
with the new one.
6.2. Expand the basic installation adding more databases. The basic setup
files include 2.5 million stars and 32,000 DS objects, and you must install
supplementary databases to get CNebulaX gifted with all its power: 25 million
stars and 1.25 million DSOs at the moment, plus 330,000 asteroids and comets.
Everything in my web is free.
6. The temporary folder where you decompressed
the ZIP file is no necessary anymore: you can remove it for freeing HD space.
The first time you run
CNEBULAX...
 6. The first run of
CNebulaX will force the program to configure the folder
locations
(also available from the FILES button within the SETUP/CONFIGURATION frame) to
create an INI file. The folders to specify are:
6. The first run of
CNebulaX will force the program to configure the folder
locations
(also available from the FILES button within the SETUP/CONFIGURATION frame) to
create an INI file. The folders to specify are:
(a) Root CNebulaX folder (required) where CNebulaX.exe
is located (default location)
(b) Constellations/stars
file
(required). Default location is the same as
CNebulaX.exe
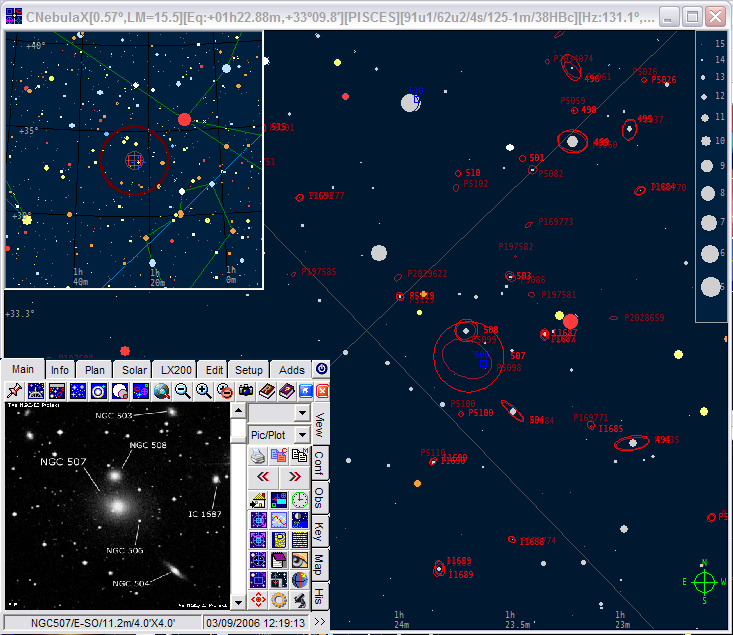
(c) NGC/IC project files (optional - do not mind it if you do not have these files
already)
·
If you have downloaded the NGC/IC
project for offline browsing preserving the site structure, you can specify the location of the DSS folder in your hard drive. If you do so, each
time you click the map on an NGC or IC object, the viewer will display the
picture (naturally the picture should be stored in the hard drive: not all
NGC/IC objects are currently available).
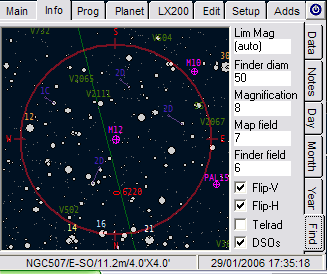
·
If you do not have downloaded the NGC/IC project, the viewer
will display the zoomed area surrounding the object instead (magnification can
be changed), or a finder map. The NGC/IC project is thus not required to run
the program, but it is a nice add-on.
(d) Standard image database folder (optional
- do not mind it if you do not have these files). This
feature is not provided, since my image collection (150,000 objects) comes from
several sources under copyright restrictions. You can link images to the
program to display them as far as you have kept certain rules for naming the
files and subfolders. If you bought an image CD from someone else (as I did),
or you create your own collection of sky pictures (as I also did), CNebulaX is
prepared to display them as you click on the maps.
 (e) User database folder
(optional
- do not mind it if you do not have these files). A
complementary folder for storing smaller image collections from mixed sources
(the file names should also follow certain rules).
(e) User database folder
(optional
- do not mind it if you do not have these files). A
complementary folder for storing smaller image collections from mixed sources
(the file names should also follow certain rules).
7. Once configured click on the [PROCEED] to end the program, which will
create the INI file. Only (a) and (b) are essential to run the program. Naturally, if (c), (d) or (e) are not available or
properly configured, some warning messages will be displayed, although the
program will start without any problem in spite of the messages. Thus, when the program ended (this is the normal
way to write the INI file), just restart it to load
the new INI file.
8. That's all! Just Once you
have restarted the program to apply the specifications in the INI file, configure the colors
and the screen at your will, set the latitude, longitude and time offset, and
enjoy it.
9. Read the documentation (highly recommended) if you want to
introduce yourself fast in the main CNebulaX features and knowing the
shortcuts.
... Again, DO NOT FORGET expanding the basic
installation of CNEBULAX adding more databases, exes updates and
documentation...
Go the COMPLEMENTS
section within this website
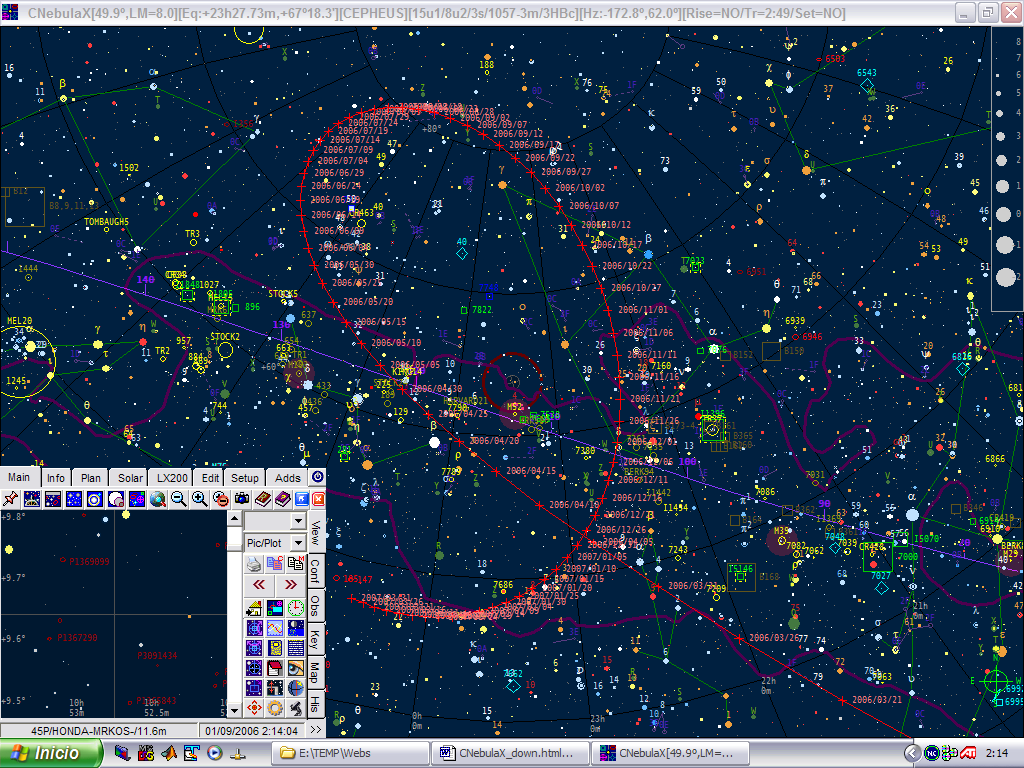
Trace of the comet
Pojmanski