1. Record a Presentation with Narration and Timings
Narrations and slide timings can enhance an automated or online presentation. You will need:
- Microphone and speakers (and optionally, a webcam).
- PowerPoint (this feature is available to all users, with additional features for Office 365 subscribers).
Basic instructions for recording:
-
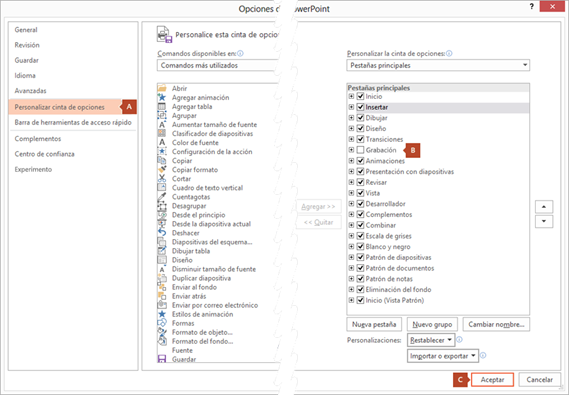
Enable the Recording tab:
- Go to File > Options > Customize Ribbon, check the Recording box, and click OK.
- Go to File > Options > Customize Ribbon, check the Recording box, and click OK.
-
Prepare the recording:
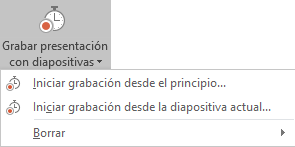
- In the Recording tab or in Slide Show, select Record Slide Show.

- You can start recording from the beginning or from the current slide.
- In the Recording tab or in Slide Show, select Record Slide Show.
-
Start recording:
- The presentation will open in the recording window. Click the red Record button or press
Ron the keyboard. - To pause or stop recording, use the buttons at the top of the window or press
Alt+Sto stop. - You can use the navigation arrows to move forward or backward between slides.
- The presentation will open in the recording window. Click the red Record button or press
-
Add narration and annotations:
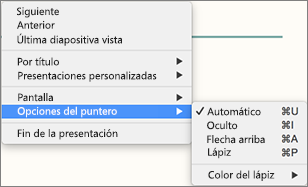
- Enable or disable the microphone, camera, and preview in the bottom-right corner.
- Use the pointer tools (pen, highlighter) at the bottom of the window to add annotations that PowerPoint will record along with the narration.
-
Finish recording:
- Click the square Stop button or press
Son the keyboard. - An audio or video thumbnail will appear in the lower corner of each recorded slide.
- Click the square Stop button or press
2. Save as Video
If you need a video file:
- Save as video: Go to File > Export and select Create a Video.
- Set options: Adjust the quality and choose whether to include narration and timings.
- Export: Save the file as MP4 or MOV, according to your needs.
Keyboard Shortcuts During Recording
Use these shortcuts to make recording easier:
- Advance to the next slide or animation:
N,Click,Spacebar,Right Arrow,Down Arrow. - Return to the previous slide:
P,Delete,Left Arrow,Up Arrow. - Start or pause automatic presentation:
S. - End presentation:
Esc. - Blank screen:
W,,(comma). - Black screen:
B,.(period).
Recording Tips
- Re-record specific slides: If you want to change something, you only need to re-record the affected slides without altering the rest.
- Pause between slides: PowerPoint does not record audio between slide transitions, so it’s useful to take a brief pause at the beginning and end of each slide.
- Preview before recording: Check audio and video before starting to ensure everything is correct.
- Use external equipment: If possible, use an external microphone and webcam to improve audio and video quality.
Publish the Video
- Upload to Microsoft Stream (optional):
- In the Recording tab, select Publish to Stream.
- Enter a title, description, and adjust viewing permissions.
- Click Publish.