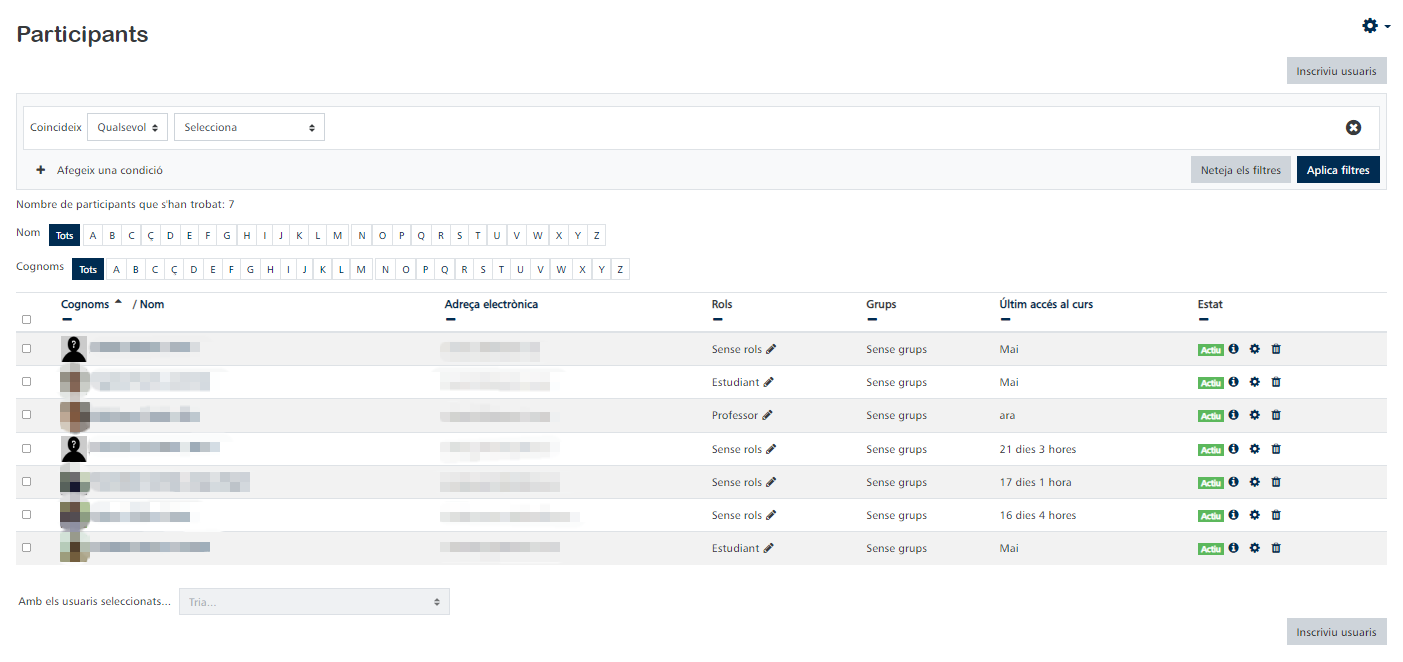
The Participants page allows teaching staff to easily enrol, view, search, filter, edit and delete course participants.
Enrol users
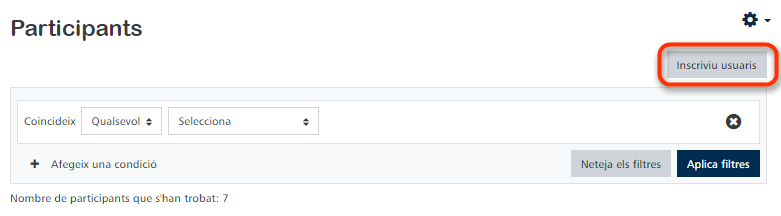
Users can be enrolled from the Enrol users button at the top right and bottom right of the screen (below the student list).
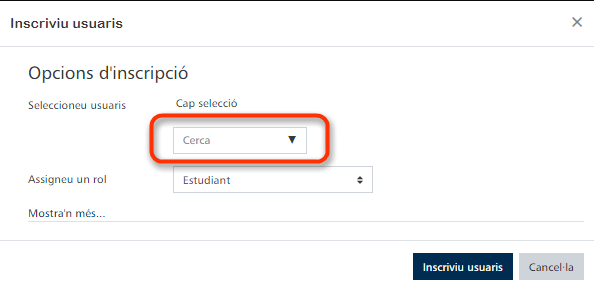
To enrol a user, search for their email address in the search engine and assign them a role (student, teacher, non-editing teacher or member with editing permissions) in the course.
Filter and search users
The filter at the top left of the screen allows filtering by activity period, enrolment method, group, roles, status and keyword. More than one option can be selected, with the option to filter 'Any' or 'All':

Users can also be searched by any of the fields defined in the "Show user identity" configuration.
Some of the searchable fields, such as user_name, first_name and last_name(s), allow you to use wildcards to represent one or more characters. There are two options:
% The percent sign represents zero, one or multiple characters.
_ The underscore sign represents a single character (Note: MS *Access uses a question mark '?' instead of the underscore '_').
These shortcuts can be ignored, if necessary, to search for users containing them, by using a reverse diagonal '\':
A_B will find all users that start with an A, followed by any character and then have a B (such as AxB or A2B, but not AxxB).
Roles
This parameter allows us to assign a role to a user already enrolled in the course. To assign a role to an enrolled user, click on the pencil icon in the role list column and then select the desired role and click on the save icon again to save the changes. To remove a role assignment, click on the delete icon (a cross) next to the role name.
To add a user to a group (at least one group must have been previously created), click on the pencil icon in the Groups column, select the pencil icon in the Groups column, then select the group and finally click on the save icon to confirm the change.
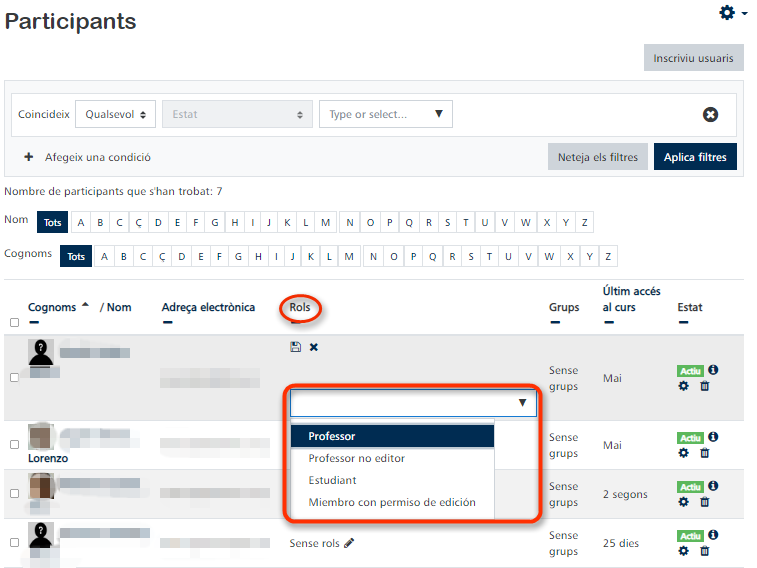
Only roles that the user has available for selection are available for selection.
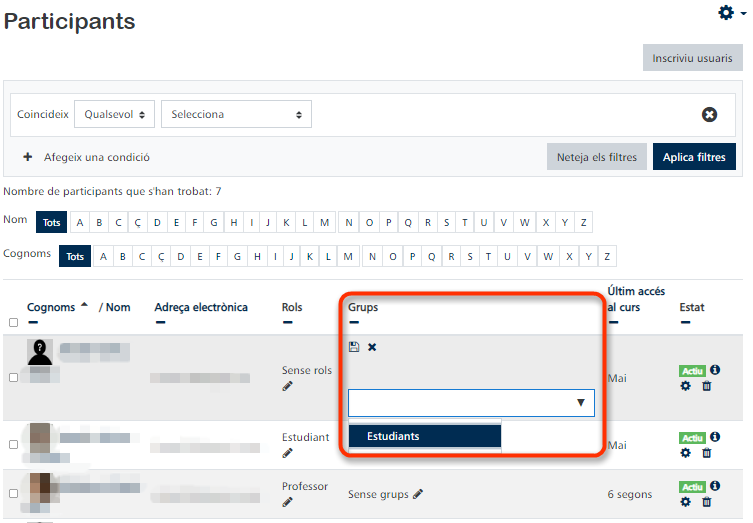
Groups
To add a user to a group (at least one group must have been previously created), click on the pencil icon in the Groups column, select the pencil icon in the Groups column, select the group and then click on the save icon to confirm the change. In this case, a group called "Students" would have been previously created and the participants could be assigned within this group.
Status
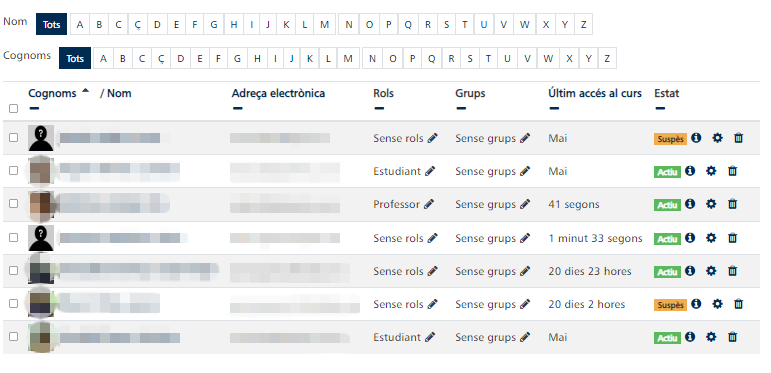
The status column shows the current status of a user's enrolments, e.g. Active or Suspended. To change the status of a user in the Virtual Classroom, click on the gear that appears to the right of the user's status.
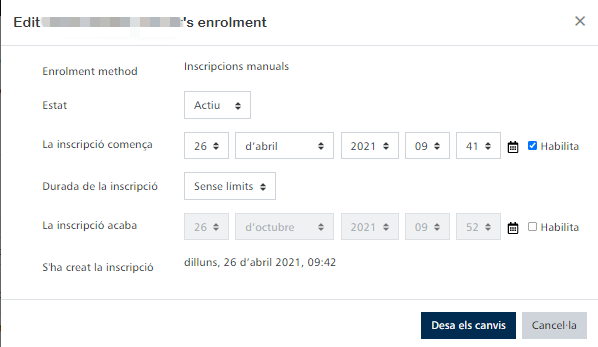
When a user is left on "Suspended", they will not be able to access the course from their Virtual Classroom until the status is changed back to "Active". When a user has two different types of enrolment (i.e. manual and cohort synchronisation), both are shown in the status column:
Send a message, add a note, or edit manual or users' own entries
A message can be sent, a note can be added, or selected manual user enrollments can be edited or deleted via the drop-down menu below the list of course participants.
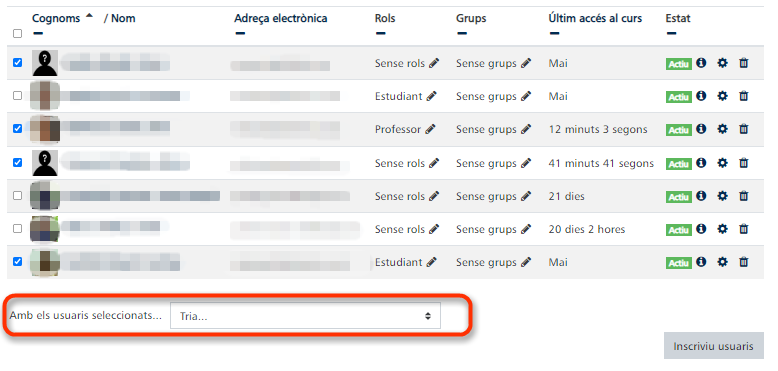
It is important to note that only users who were previously self-enrolled or manually enrolled (enrolled) can have their enrolments edited or deleted in mass. Enrolments for users who enrolled using a different enrolment methods, such as self-enrolment, can be edited or deleted for a user via the link to edit enrolments (gear icon) in the status column.
Hide the participants list
If needed, the View participants parameter can be used to prevent students from seeing the list of participants.
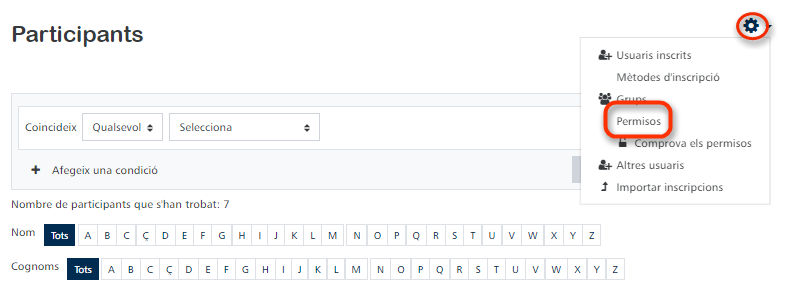
On the Participants page from the Actions Menu (gear icon) select permissions:
Filter by viewparticipants (view participants)
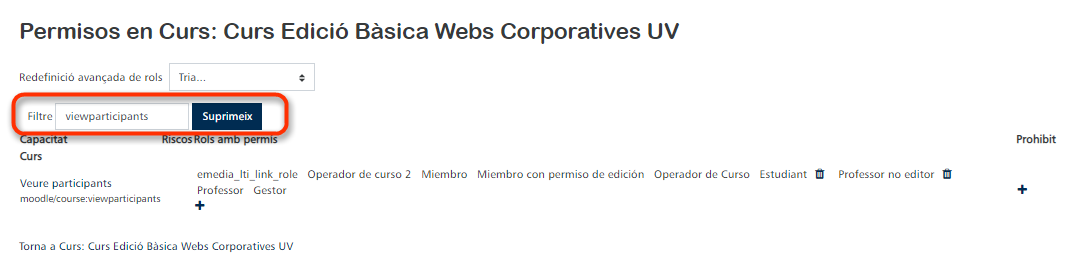
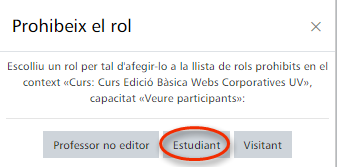
For the capability 'View participants' remove the student role and confirm.
At the site level, the 'View participants' capability can be disabled for the student role.