To facilitate small group collaboration, workgroups can be created independently from the main room and assigned attendees.
Workgroups have their own audio, video, whiteboard, application sharing and private chat. Any collaboration that takes place in a group is independent of the Main Room (and other groups).
- If the session had more than 250 attendees, the breakout groups would not work.
- What is said or viewed in a breakout room is not captured in recordings.
Start working groups
Blackboard Collaborate can create and randomly assign workgroups for us, or we can create custom workgroups.
- Open the "Share Content" panel from the Collaborate dashboard.
- Select Workgroups.
- Assign the groups. Select Assign randomly or Custom activity.
Randomise: Collaborate creates the groups and randomly assigns attendees for us.
Random assignment is only available when there are four or more people in the room.
If we want to be part of a group, we select "Include moderators" in the groups activity.
We can change the number of attendees in each group. To do this, select the number of groups you want from the Number of groups menu.
If we don't like the way the attendees are grouped, we can select the option Reassign attendees.
Personalised activity: Create your own groups.
Assign attendees to a group. We can select the attendees options menu and then the group. We can also select the assistant and drag it to the correct group.
Select Create a new group to add more groups.
Up to 20 groups can be created. Working groups are only available in sessions of 250 attendees or less. There is no limit to the number of attendees we can place in each group. However, it is recommended to distribute attendees evenly in the groups.
Optionally, the Allow attendees to change groups can be selected, if the attendees want to be able to move to another group on their own, by selecting "Start".
Sharing files in workgroups
Files can be shared with one or more workgroups.
- After starting the workgroups, select Share files.
- Open the File Options menu of the file you want to share.
- Select Share with groups.
- Choose the groups you want to share the file with.
- Select Share now.
The first slide of the file will be displayed in the workgroup.
The files in the group can also be saved for later use. It is important to locate the workgroup files and save them in the main room before closing the session.
Participants' role in a working group
Each attendee in the group is a host. This means that all attendees can share the whiteboard, files and applications with the rest of the group.
Content shared in a working group will not be available when the working groups end. Attendees should consider suggesting that they record their collaboration in some way. For i. e.: A screenshot of everything they have shared or contributed.
Group supervision
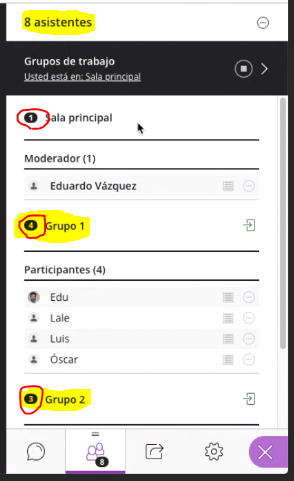
After the working groups have started, groups can be moved between groups to monitor them. If we have assigned ourselves to a group, we will see and hear what the other participants in the group are doing. This includes any shared content, audio, video and chat.
If we want to see how other groups are working, we need to join those groups.
In the Attendees panel, select Join Group.
Group chats are private to the group. The "Everyone" chat room is open to everyone, regardless of which group we are in. As a moderator, we also have a moderator-only chat room.
Mover asistentes a otro grupo
Moderators can move between groups via "Join group" in the Attendees panel. Other attendees can also be moved.
- From the Assistants panel, select an assistant and choose Assistant Controls.
- Select Move to another group. This opens the Workgroups pane.
- Move the wizard to another group.
- Open the Assistants' options menu and select the group.
- Choosing the assistant and dragging it to the new group.
Select Update. At any given moment we can choose to move a person back to the main room or to another group. Or we could also remove them completely from a session: Open the attendee options menu from the Attendees pane and select Remove from session.
If another moderator makes changes to a group before we select Update, our changes will be lost and we will receive a notification that another moderator made those changes.
Closing workgroups
When we want to close workgroups and bring all participants back to the main room, we select End workgroups from the top of the Attendees panel or next to Workgroups in the Share content panel.
After we select End workgroups, all attendees are moved back to the main room.
After groups have ended, anything shared in a group will not be available in the main room. We should let all attendees know well in advance that we are going to end the working groups. This way, they would have time to take screenshots of the material they were working on, or to have it recorded in some other way, before the end of the groups.
Saving workgroup files
Group files can be saved for later use by depositing them in the main room before closing the session.
- After finalising the working groups and before closing the session, select Share files.
- Open the group folder.
- Open the File Options menu of the file you want to save.
- Select Move to main room files.
The group file will be saved in the main room and can be used again.