UVdocència:UVdocènciaUniversitat de València Logo del portal

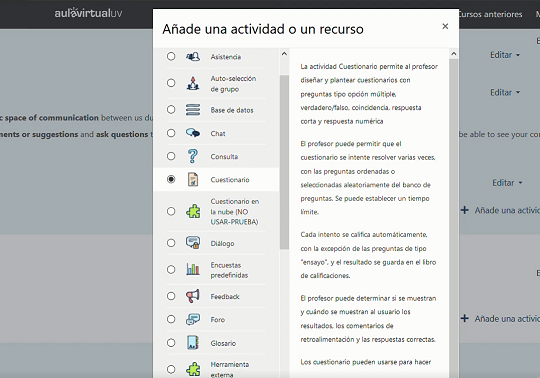
The Quizzes module is a tool that allows us to identify whether our students are achieving the learning objectives of the subject, or whether they need reinforcement of the course materials. In a sense, through this module, we receive feedback that relates to the students' specific understanding of a topic. The module is also useful for improving in areas where understanding is weak in answering similar questions when using batches of question banks.

Quizzes may be used

  • As course exams
  • As mini tests for reading assignments or at the end of a topic
  • As exam practice using questions from past exams
  • To deliver immediate feedback about performance
  • For self-assessment

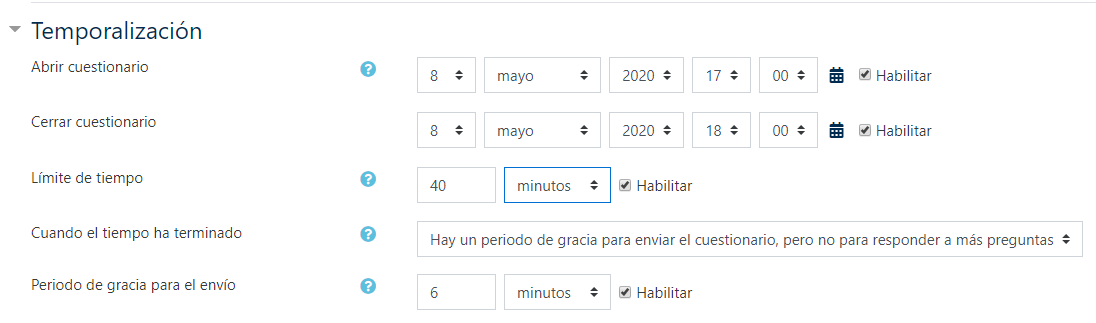
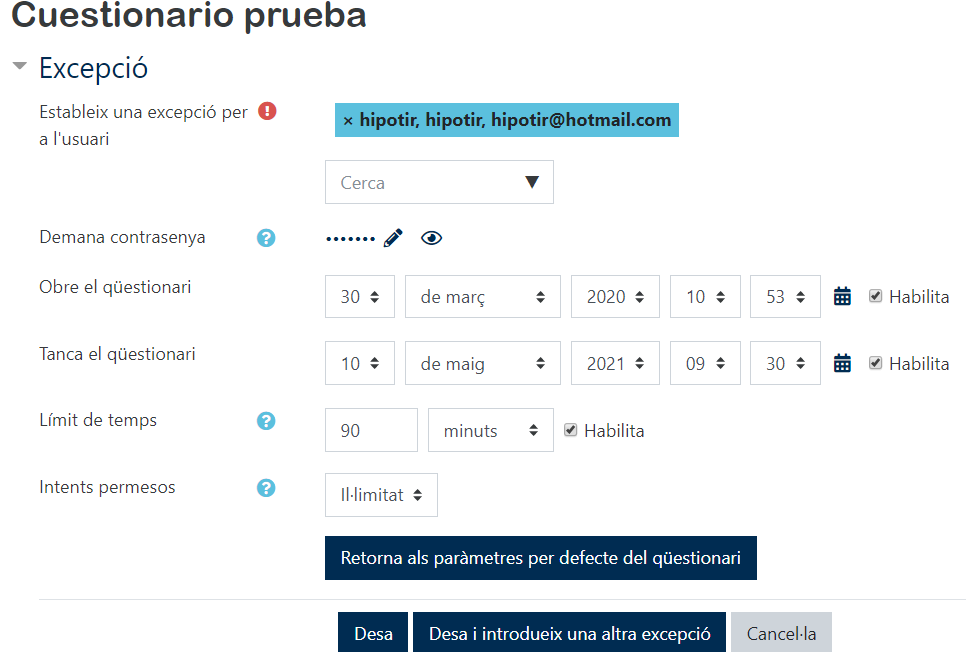
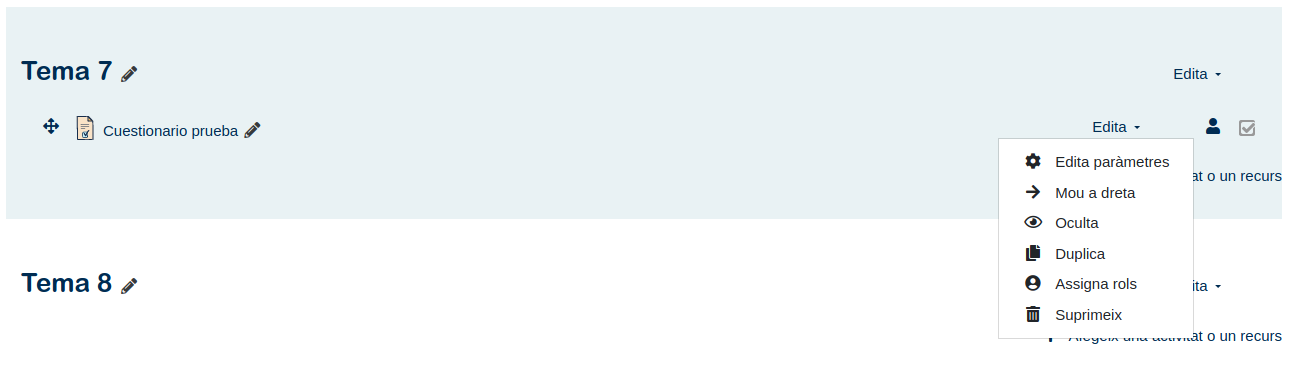
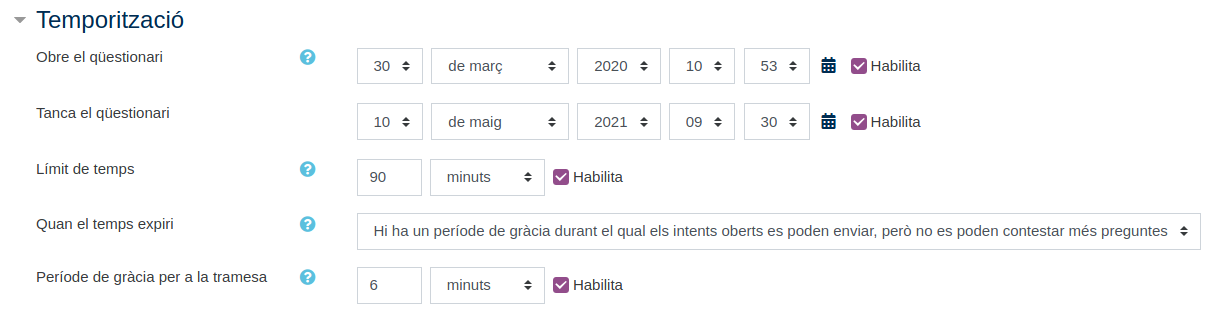
In order to edit the parameters offered by this module in the Virtual Classroom we have to keep in mind different agents when carrying out our questionnaire.

In timing, one of the features that can be edited and modified in the module is to adjust when students can start their attempts (opening) and when they can finish them (closing). We also have a parameter with which we can enable a time limit for the quiz; in addition, a countdown timer appears during the quiz. The parameter "When time is up" is the one that sets what happens if a student has not handed in or has not finished the quiz within the time limit.

In the grade section we find parameters that we can edit to establish, for example, the minimum grade to consider that this questionnaire, test or exam has been successfully passed. We can also mark how many attempts our students have to take the test and, if the test can be taken more than once, what the final grade will be. Each attempt is automatically marked, with the exception of open-ended questions, and the mark is recorded in the grade book.

In layout, you can customise the number of questions that appear in the questionnaire, changing pages according to the number of questions you want, since, in very long questionnaires, it makes sense to split into several pages by limiting the number of questions per page.

Within question behaviour, we have an option that allows us to shuffle the questions randomly each time a student attempts the test, as long as the option is also enabled in the question parameters. This parameter also gives us the option to modify the behaviour of the questions, i.e. it allows us to enable the option for students to submit the entire quiz before receiving feedback or for students to receive feedback for each question they answer (with the option to re-answer the question with the lowest score).

The "Review options" parameter controls what information is visible to students when they are reviewing a quiz attempt or when viewing quiz reports.

Under Appearance, we can enable a parameter that allows the picture of our students to be displayed while the test is being taken. This makes it possible that, in a proctored environment, it is easy to check that our students are logged in with their respective account.

Under Extra restrictions on attempts we can add an access password (which we will share with the students) to our questionnaire, as well as a mandatory tick box on the knowledge of the academic honesty policy.

Within Overall Feedback, we can edit a text that will appear after finishing a quiz attempt. This parameter also allows us the option to add more feedback fields depending on the grade the student has obtained.

Once we have edited and adjusted these parameters and without leaving the editing mode, we will save the changes and visualise our questionnaire. At this point, we can add the questions to our questionnaire by accessing the "Edit questionnaire" option.

We can then add a question manually, from the course question bank or a random question. We can also mark what the maximum score of the test will be by modifying the number that appears on the top right hand side of the panel where it says "Maximum score".

Moodle offers us a large number of options to set up our questionnaire. Within this panel, as well as choosing how we want to set the question, we can see a brief description of what the question looks like. Another key point is that we can vary the type of questions, i.e. we can add a true/false question, followed by a multiple choice question and a short answer question.

For this example, we have chosen the true/false option. As can be seen in the screenshot, we can edit two types of feedback depending on the answer our student provides. If the student answers correctly and determines that the answer to the question is "False", the student will receive a different message than if the student answers incorrectly.

Once we have saved our question and its parameters, we will return to the main panel of the questionnaire and we will be able to continue adding the questions we want. In addition, we can choose that these questions appear mixed; in other words, without following the initial order in which we have edited them.

Once the quiz is ready and saved in the Virtual Classroom, we deactivate the editing mode, click on the quiz and select the option "Preview the quiz now".

Our students would see the quiz as illustrated in the following screenshot. In the centre, framed in green, the questions would appear in their respective format. In the upper right part of the image, in ochre, the parameters that we have also edited would appear: the response time limit, the number of questions... At the bottom right, circled in red, we would find the box with which we would end the attempt.

Finally, when we finish the attempt, the quiz report will appear, showing the date on which the attempt was started and finished, how much time the student has invested in the test, the status of the test, how many points the student has obtained and the final grade. In the body of the questionnaire, we can see which answer the student has ticked and under the question box, the feedback we have added to the edit parameters is displayed. At the top right, we can see which questions of the questionnaire our student has passed (in green and with a check mark) and what he/she has failed (in red and with a circle inside).

More help


How to create a questionnaire


Types of questionnaires


Recommendations