Groups are groupings of students enrolled in the same course. This Moodle tool is very useful, for example for the creation of collaborative work groups in a course or if we want to generate a questionnaire (or test) so that one group has a questionnaire and a different group has a different one.
CREATING A GROUP
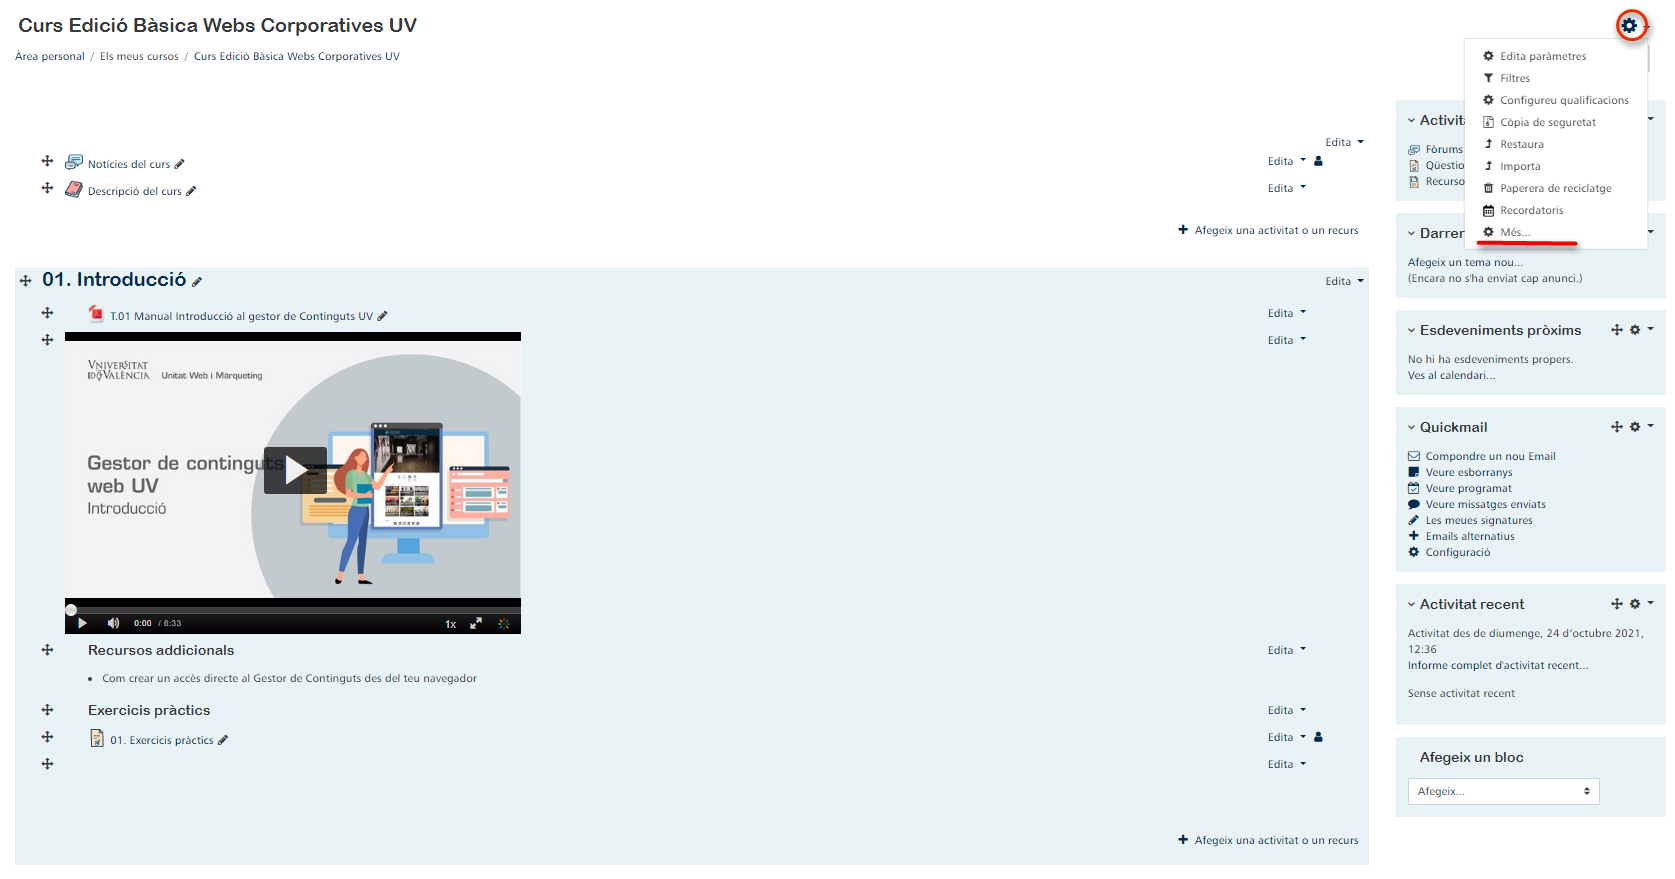
This function does not appear by default on any page, so, whoever requires it, must activate the editing mode, in the Actions menu, located in the upper right-hand gear, we find the list of existing groups in that course. This is where we will access to create new groups if we wish to do so.
To access the groups panel and create a new group in a course in which we have permissions, we will activate the editing mode and look for the gear located at the top right of our screen, just above the control to deactivate the editing mode. In this panel we will find different commands, to access the groups we will click on the last option, "More".
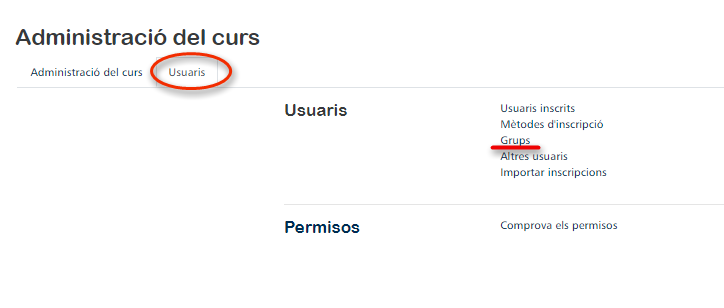
This will take us to Course Administration, click on Users and from here we will go to Groups.
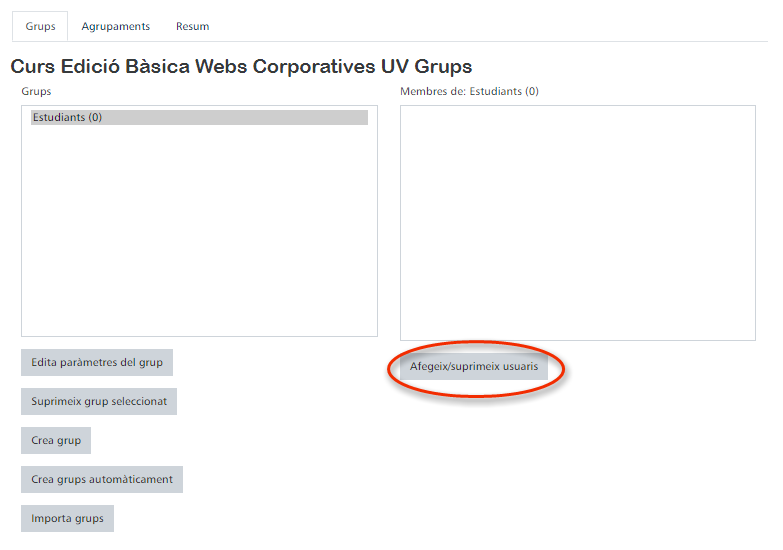
Two columns will appear on the screen: one with the groups created (on the left) and one with the members that make up this group (on the right). Under the left-hand column, the available options for creating groups appear: create group, create groups automatically and import groups. In the right-hand column, the option to add/remove users appears.
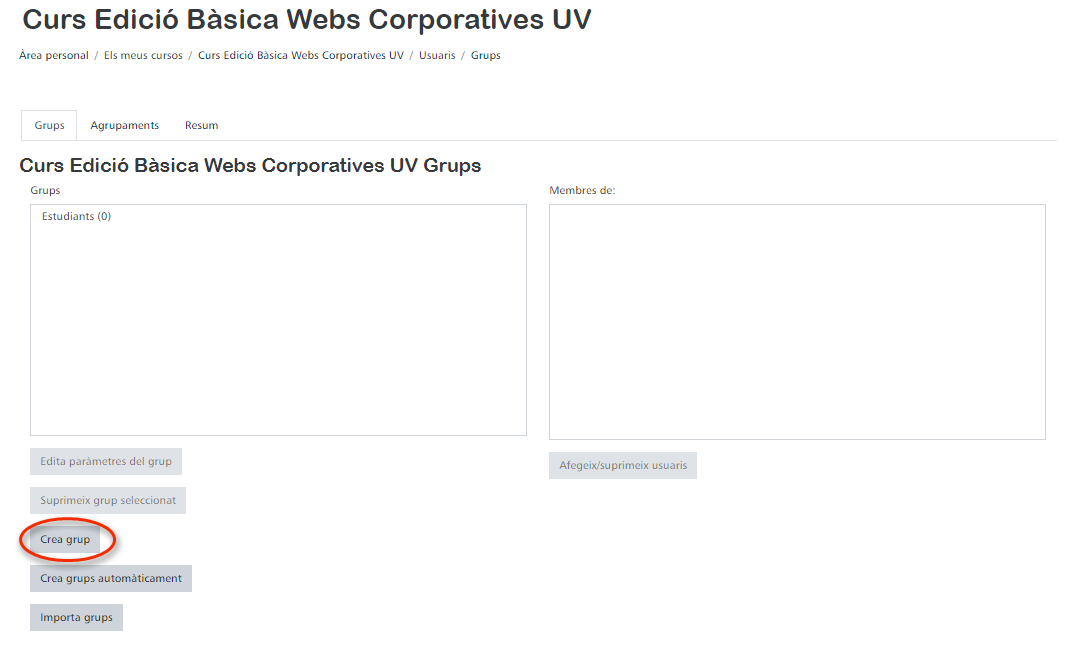
When selecting a created group, both options will also be activated:
- Edit group settings: this option will allow us to edit a group already created and modify the parameters, such as the group description, messaging...
- Delete selected group: deletes a group. Once a group has been deleted, it cannot be recovered.
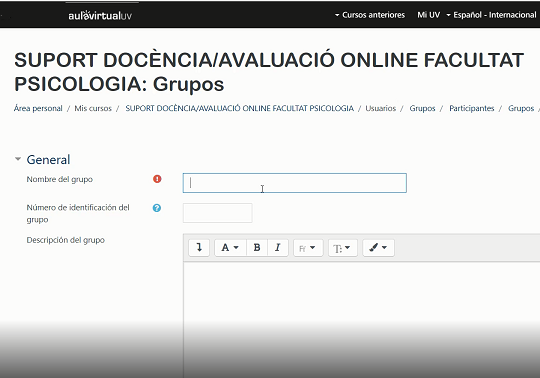
CREATING A GROUP SETTINGS
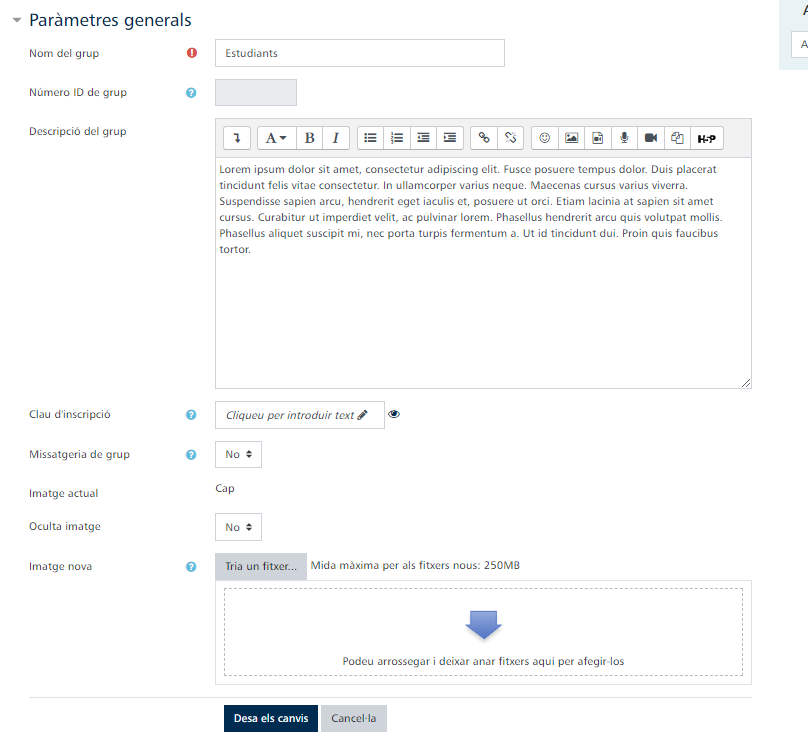
- Group name: name by which the group is identified.
- Group ID number: this parameter is only used when comparing the group against external systems and will not be seen elsewhere on the site. If the group created has an official code name it can be entered, otherwise the field can be left blank.
- Group description: a brief description of the characteristics and/or purpose of the group.
- Enrolment key: this parameter opens access to the group, which is limited to members who know it. In case of specifying an enrolment key, the user will join the group as a member.
- Group messages: it is possible to activate the option to allow group members to send messages to other members via the message menu.
- New picture: you can select an identifying image for the group.
- Hide picture: You can hide the selected image for the group.
Auto-create Groups Settings
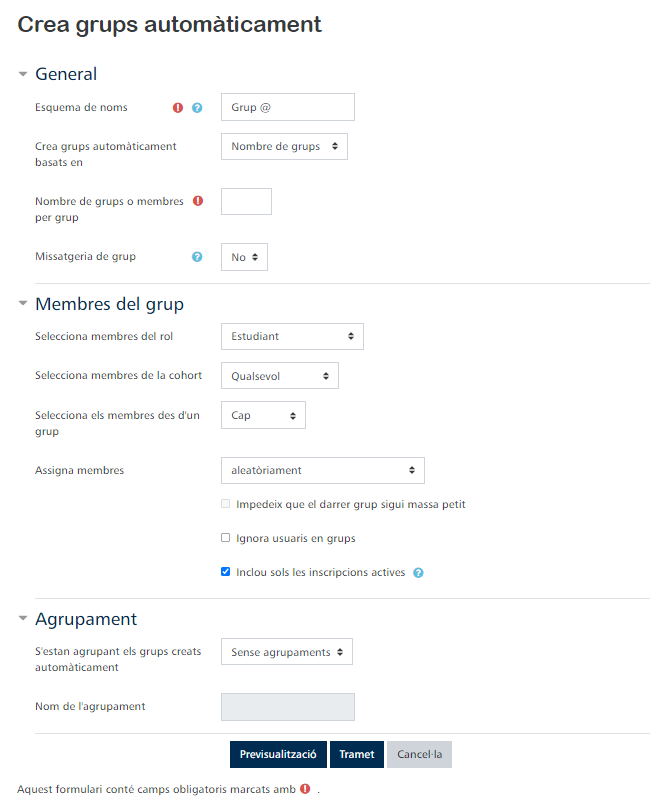
- Naming scheme: This parameter is determined by the @ symbol and the #. With the at symbol (@), groups with names containing letters (A, B, C) are created. While the hash symbol (#) is used to create groups in numerical order.
- Automatic creation based on: this parameter conditions the number of groups or members per group, as we have to choose whether we want to automatically generate groups based on the number of groups or on the number of members. For example, if we choose to automatically create groups based on members per group and then delimit that we want one member per group, in a class of 50 students, we would generate 50 groups.
- Group member count: this delimits the maximum number of groups or members that can be part of a group.
- Group messages: it is possible to activate the option to allow group members to send messages to other members via the message menu.
- Select members with role: this parameter allows us to choose who will be part of the group, whether it will be a teacher or a student (among other roles).
- Allocate members: this parameter allows us to assign members randomly, by their ID number or alphabetically by their first or last name.
- Grouping: in this case, a grouping would be a conglomerate of the groups that are automatically generated. If, for example, we want to make groups for a subject project, this would be the option of having all the groups that are generated within a grouping.
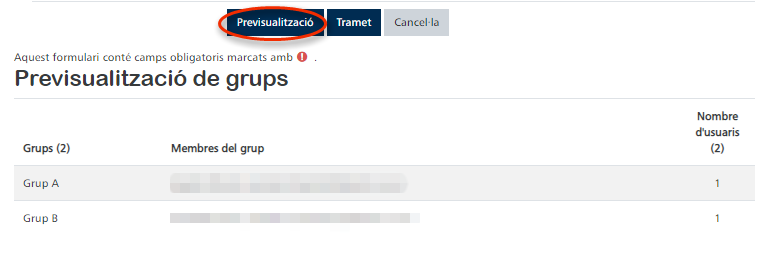
- Preview: with this option, we can have an idea of how the generated groups will be organised and, if necessary, make any modifications.
Add students to a group
There are two methods for adding students to the created groups.
- Several students
First of all, with a group previously created and with the editing mode activated, access the groups section. In the left-hand column you will see the group you have created and at the bottom of the right-hand column click on the option "Add/remove users".
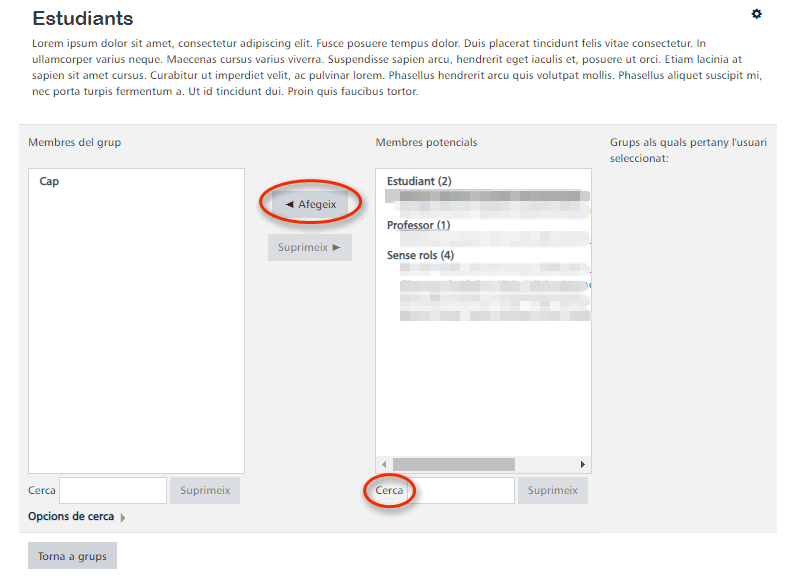
In this screen we will have two columns: group members (left) and potential members (right). Also, to the right of potential members we have the parameter "Affiliation of the selected user". This will show us, in case of selecting a user, to which groups he/she is attached.
To add users to the group we can select them one by one from the column on the right, always by clicking on the "Add" button. A faster and more efficient method would be to press the CTRL key on your keyboard and click on the name of several potential members, so that you can select multiple members for the group without having to go through them one by one. It is important to remember that you must always click "Add" whether you use one method or the other.
If you have a large list of course participants, you can search for them more efficiently by using the "Search" button at the bottom of the Potential Members column.
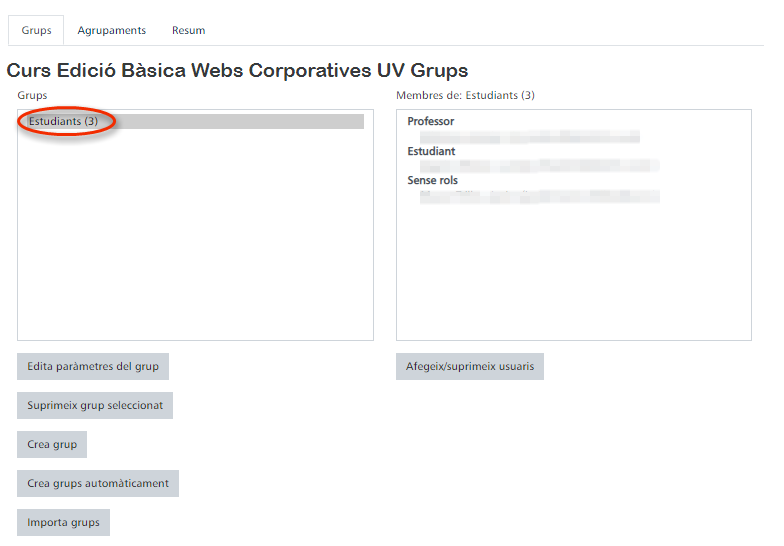
Once we have added potential members to our group, we will be able to see in the Groups screen the name of the group along with the number of members in our group (in the left column) and who it is composed of, as well as their respective roles (in the right column).
- Student by student
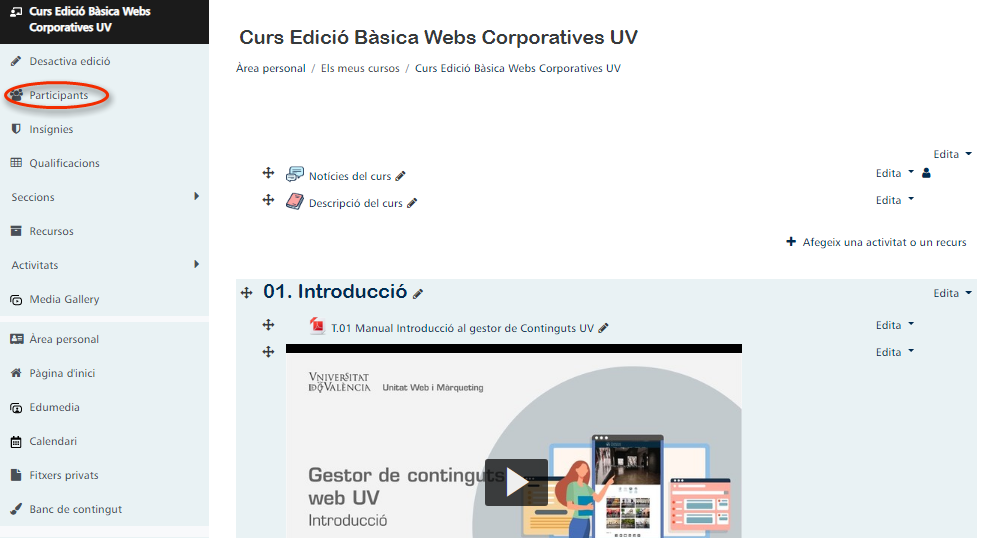
With the groups previously created and with the editing mode activated, access the main screen of the course and click on the Participants section.
Access the list of participants for the course in question and notice that there are five columns for each participant, one of them being Groups. In this case, no member is part of any group yet. To add to a group you have created, click on the pencil icon to the right of "No groups".
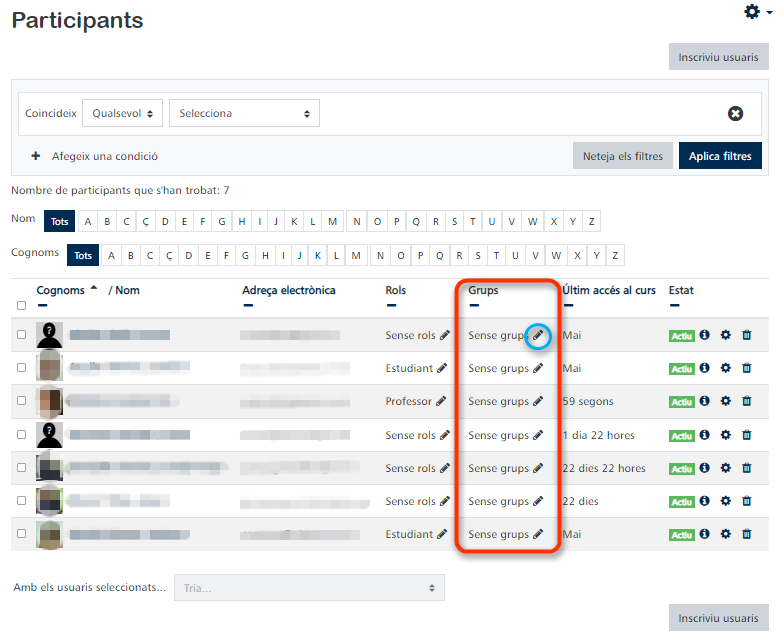
Once we have clicked on the Groups pencil, it will allow us to select which group we want to add our student to. It is important to remember that we have to Save whenever we select a group for a student. The save icon appears at the top of the Groups box for each participant.

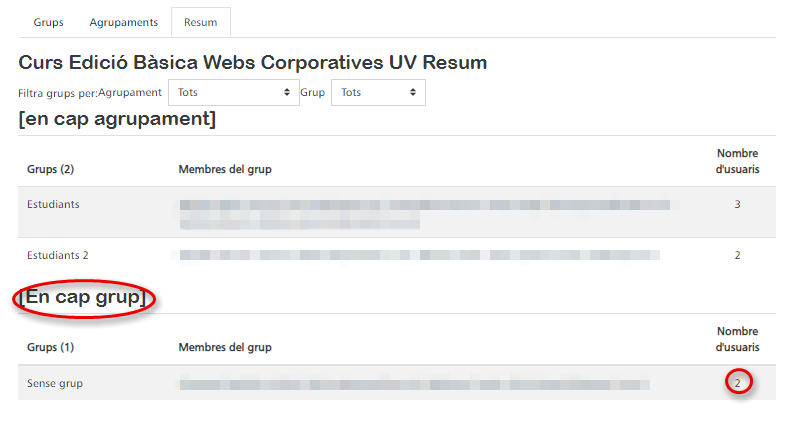
Once we have added the participants to their respective groups, either using the student-by-student method or the multi-student method, we will access the groups section again and click on the Overview tab. This will display a list of the groups created, with the names of the members and their e-mail addresses.
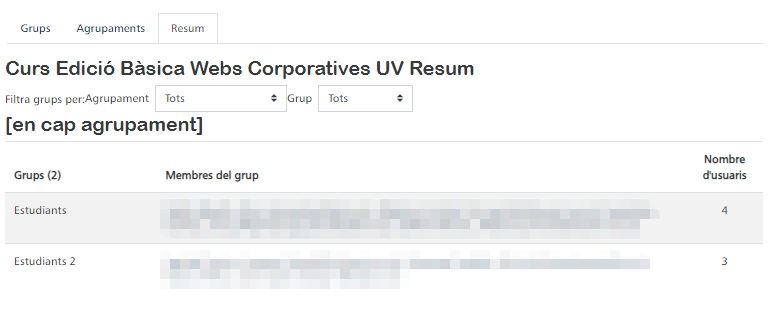
Accessing this tab is important to check if there are any course participants who have not yet joined any group. In this case, in addition to the groups we have created, a section will appear under the name "NOT in a group" together with the name and email address of the participants who are not yet added to any group.
